
3、Account Status Filter
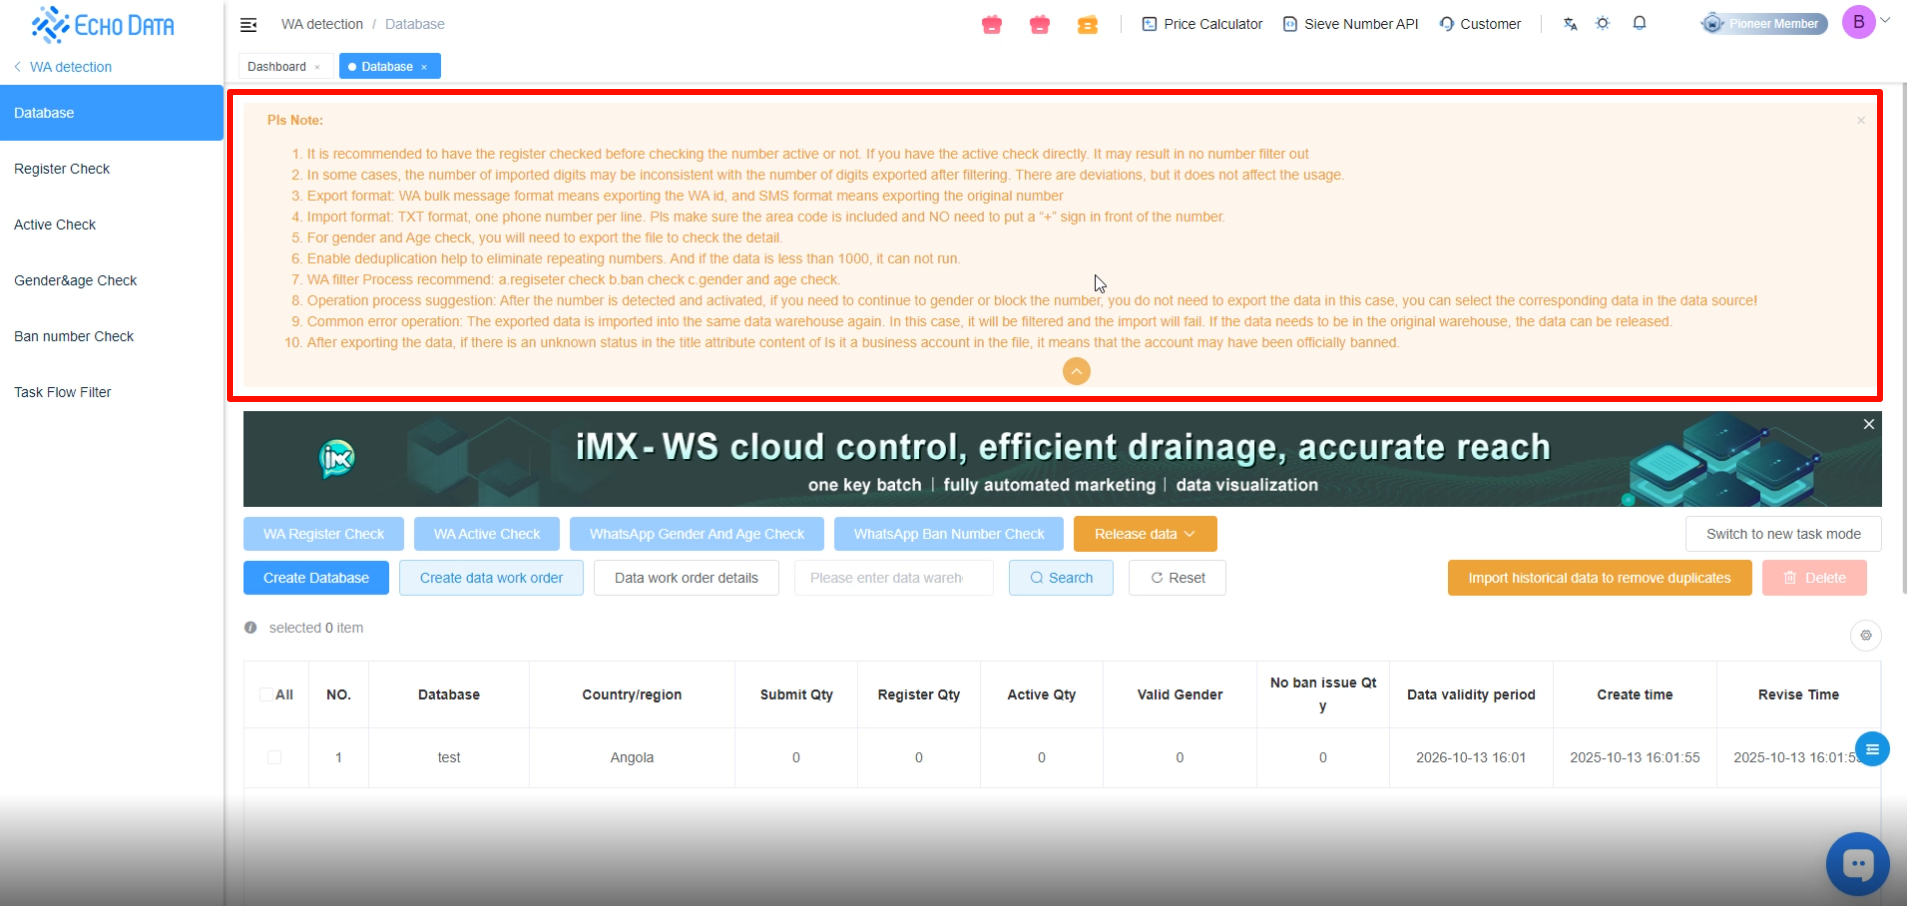
Before starting the filtering process, please read the service guide. It helps you quickly understand the process and resolve most common issues.
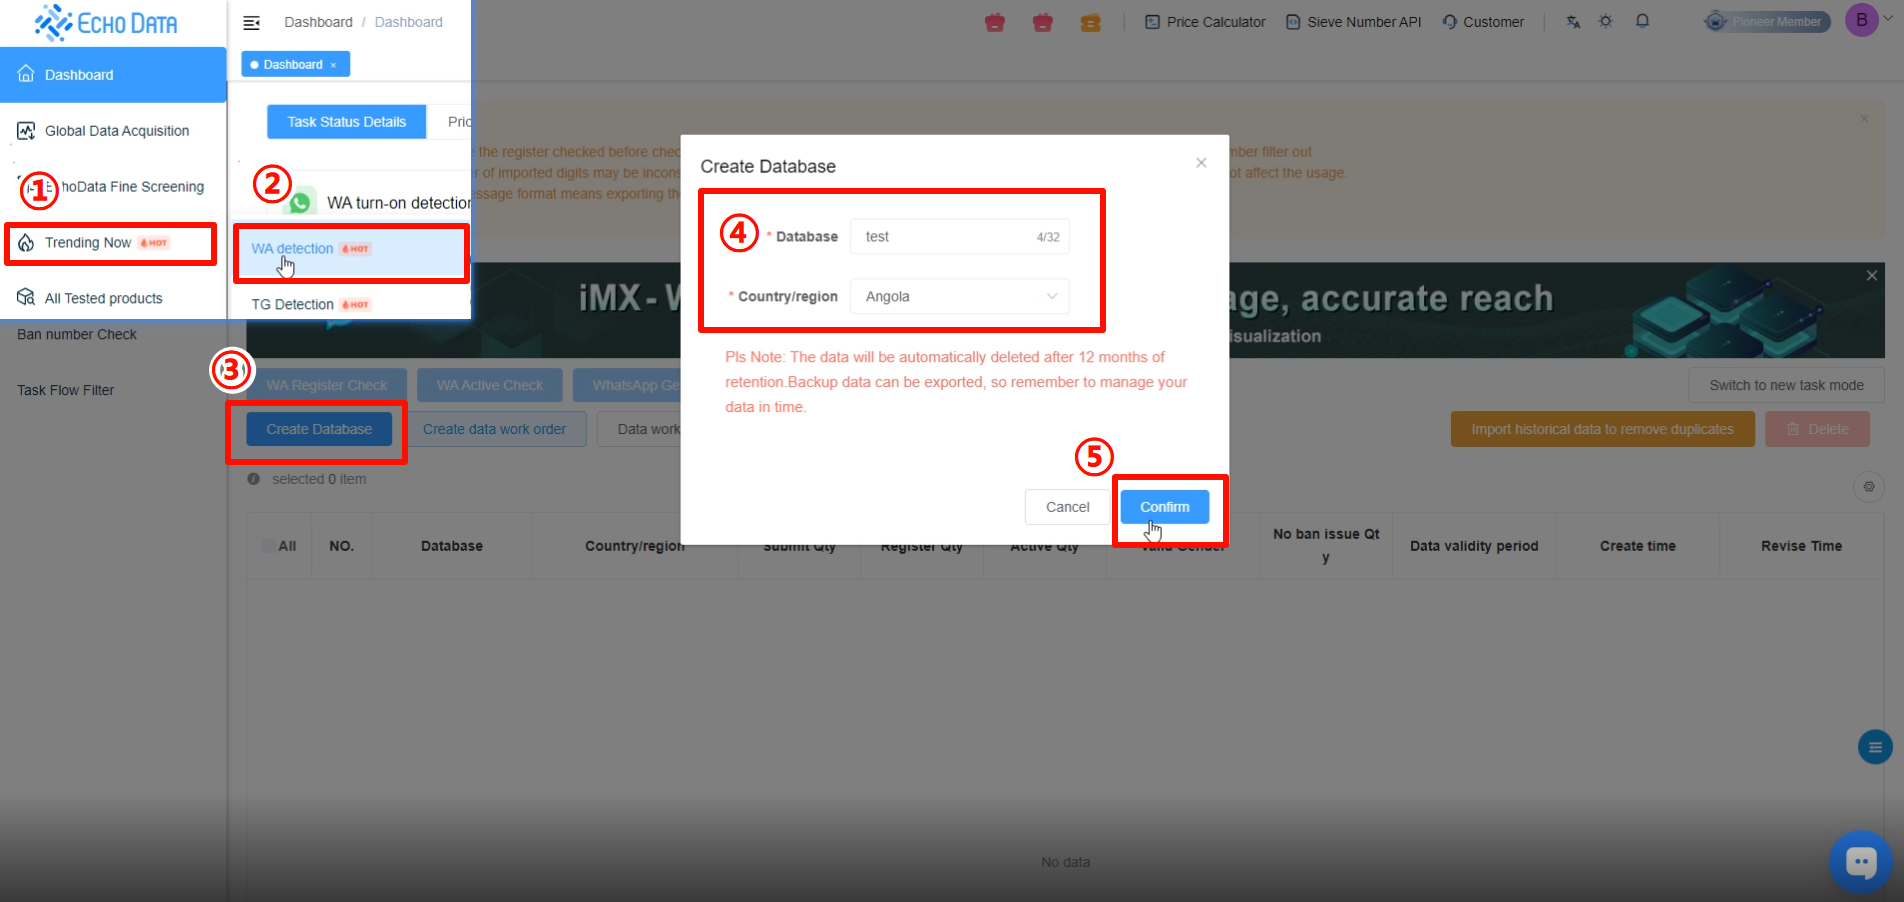
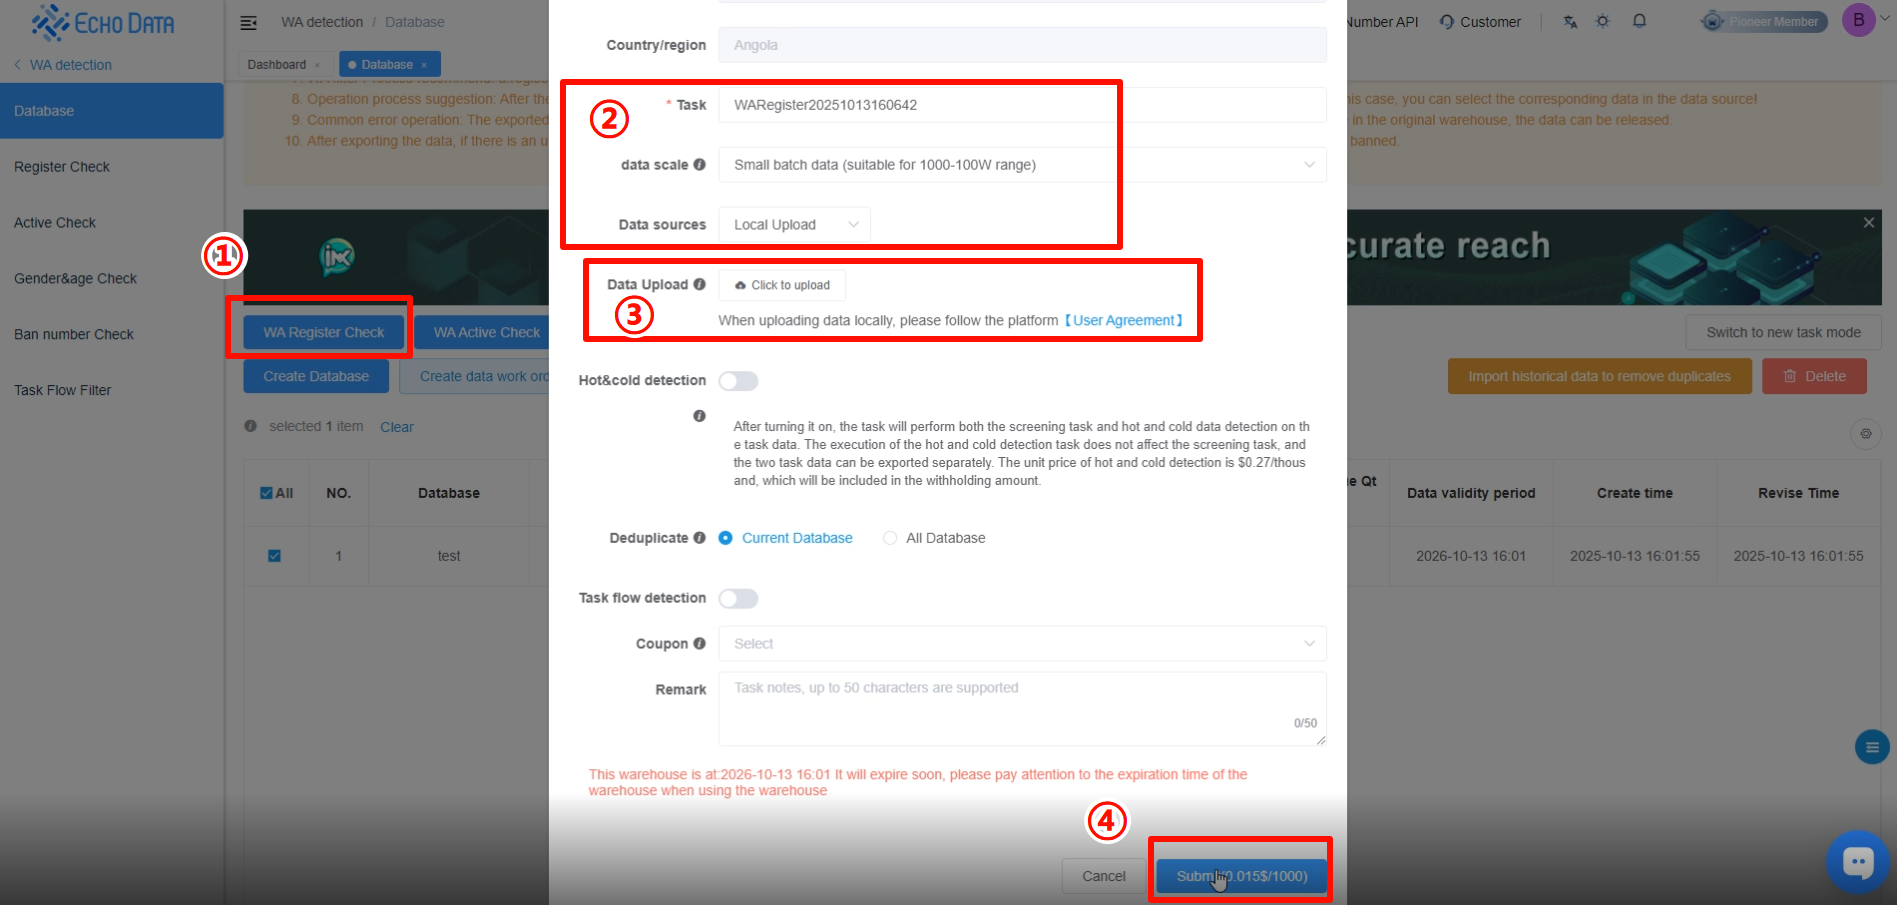
1.Select the corresponding data repository, then click [WA Register Check].
2.Enter the task name.
3.Choose the data volume to be filtered. Note that the deduplication method will vary depending on your selection.
4.Select the Data Sources:
Option 1: Upload local data for filtering.
Option 2: Use existing system data for filtering.
5.Enable Hot & Cold Detection and Task Flow Detection as needed.
6.Select the deduplication range:
Current Repository: Deduplication applies only within the selected repository.
Global Repository: Deduplication applies to all repositories under the same country.
Note: A larger deduplication range will increase processing time. Please select according to your needs.
7.Click [Submit] to start filtering.
Note: A minimum of 1,000 records (after deduplication) is required to run the filter.
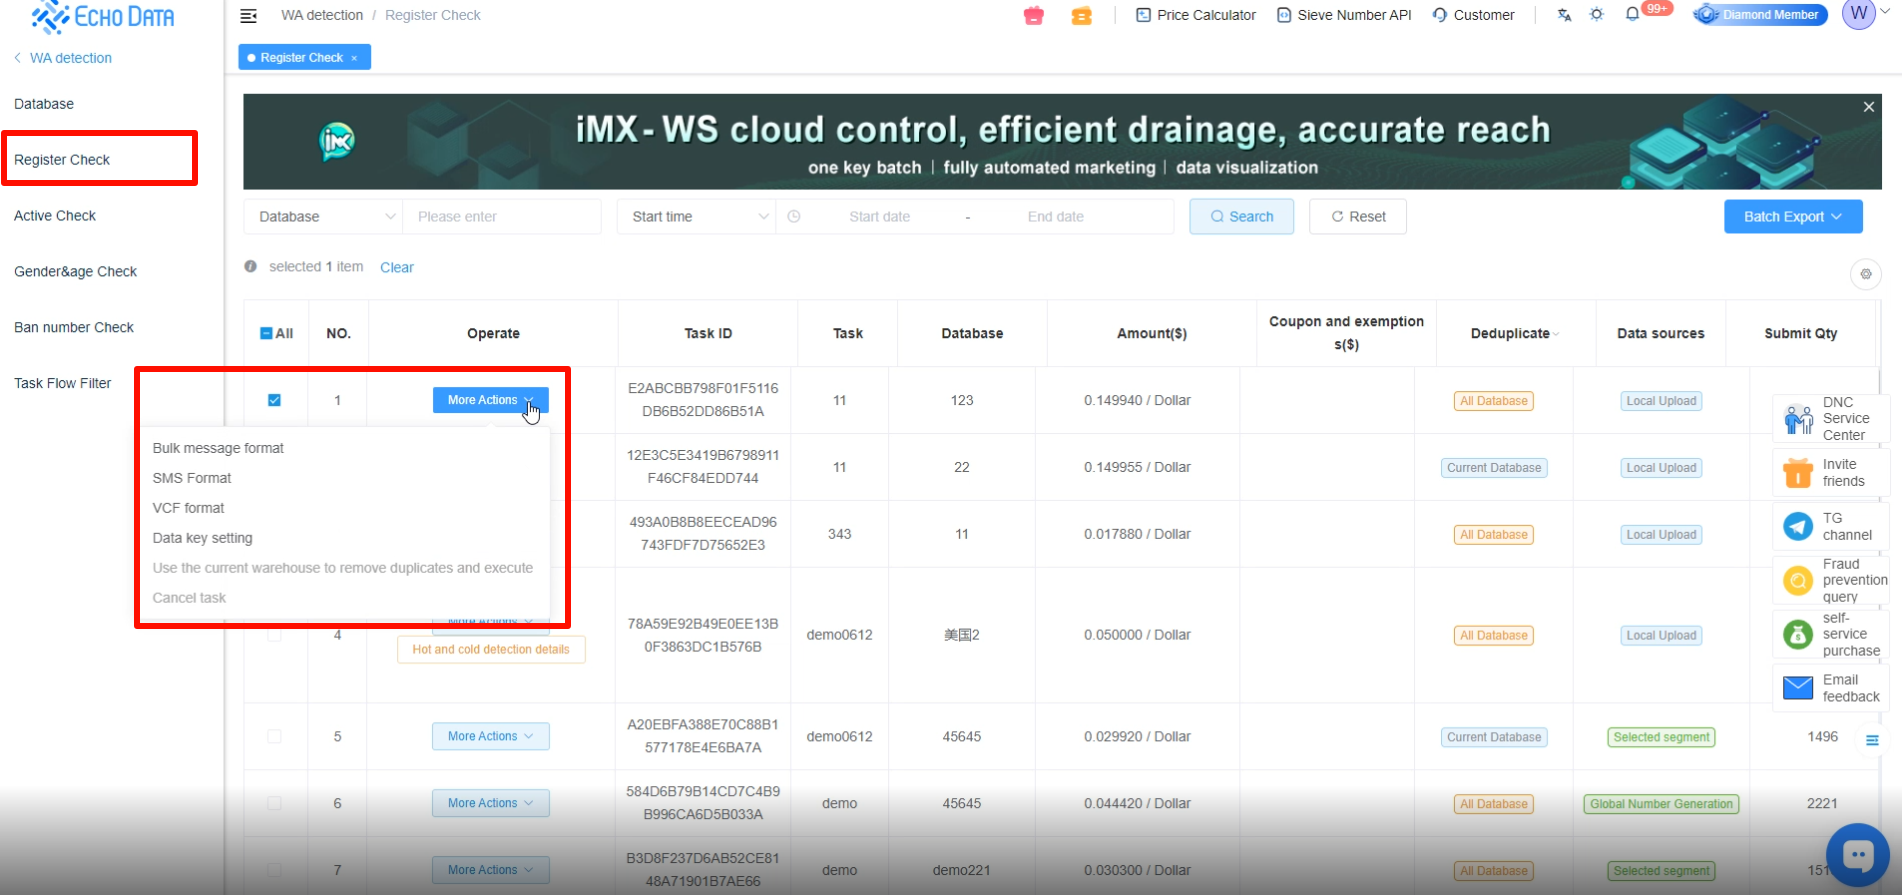
Once the submission is successful, go to [Register Check] to view the filtering progress.
You can check the task details, including configuration settings and data status.
Click [More Actions] to export the data format according to your usage needs.
4、Filter by Activity
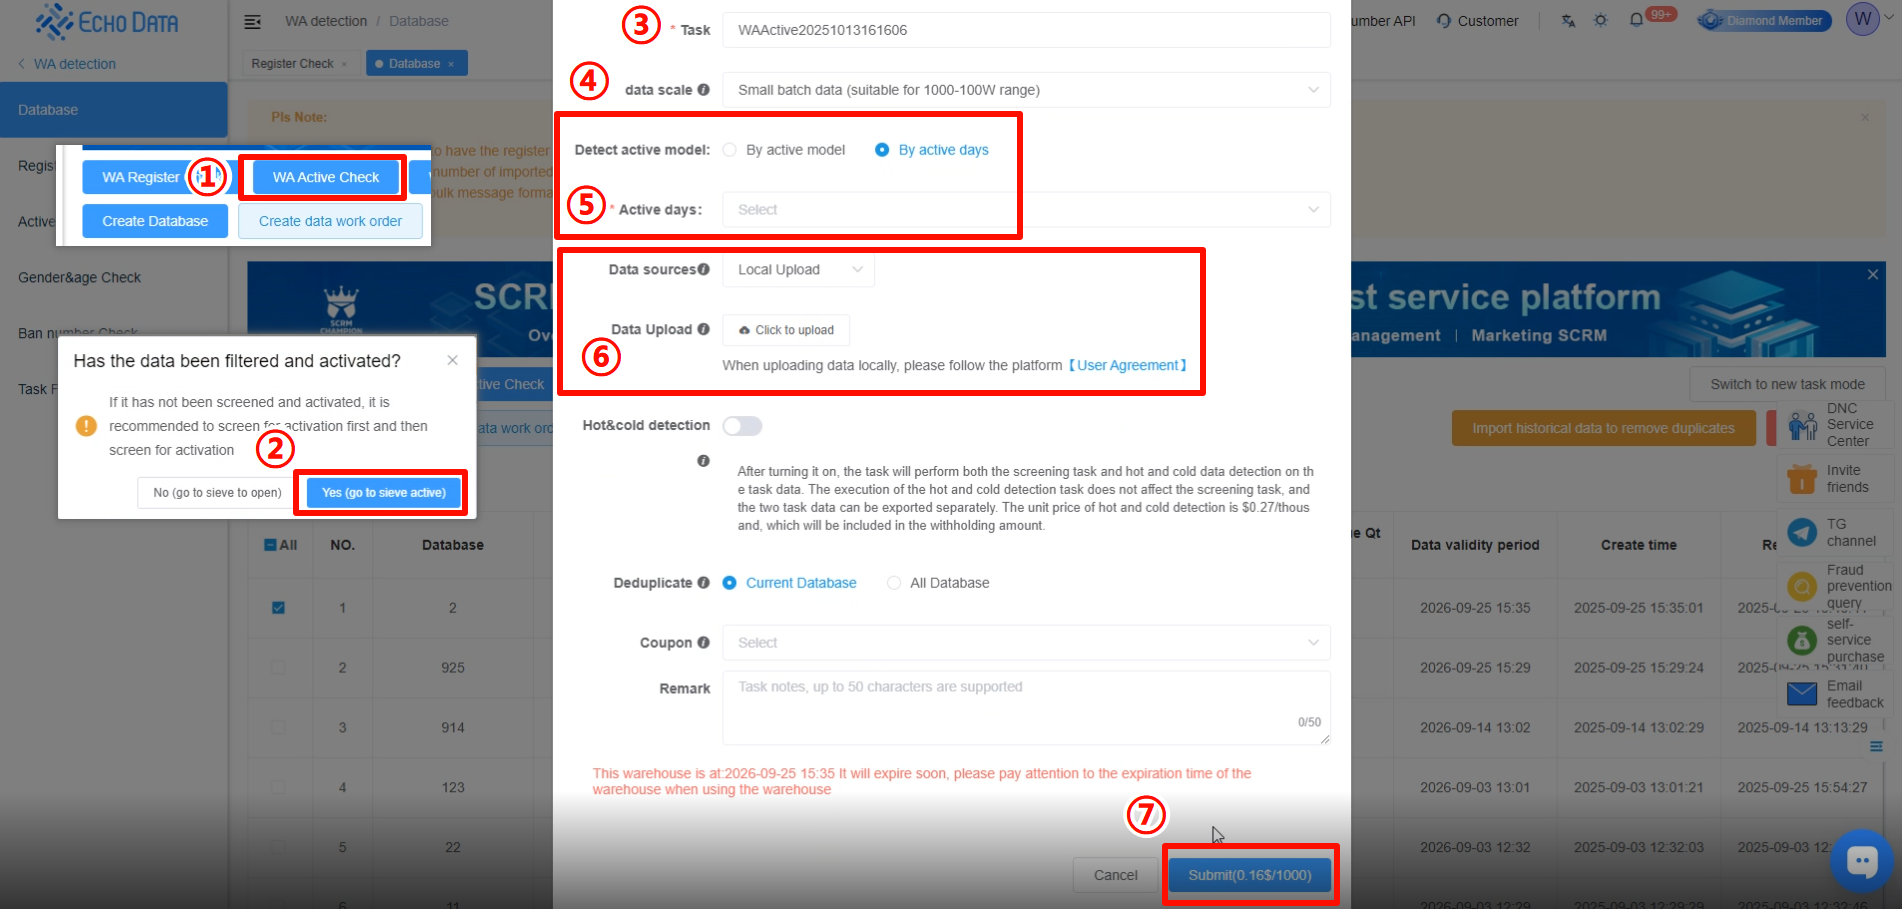
1.Select the corresponding data repository and click [WA Active Check].
2.It is strongly recommended to complete the Active Check before filtering by activity.
This helps avoid inaccurate results, such as too few active numbers, which may actually be due to unregistered or invalid numbers.
3.Enter a task name.
4.Select the Model Selection. Choose to filter by activity level [High / Medium / Low] or by active days [1 / 2 / 3 / 5 / 7 / 10 / 15 / 30 days].
5.Select the Data Sources:
Option 1: Upload local data for filtering
Option 2: Use existing data stored in the system
6.Choose whether to use all repository data or data from a specific task.
7.Select the dataset you wish to filter by activity.
8.Enable Hot & Cold detection if needed.
9.Click [Submit] to start filtering.
Note: A minimum of 1,000 deduplicated entries is required to begin filtering.
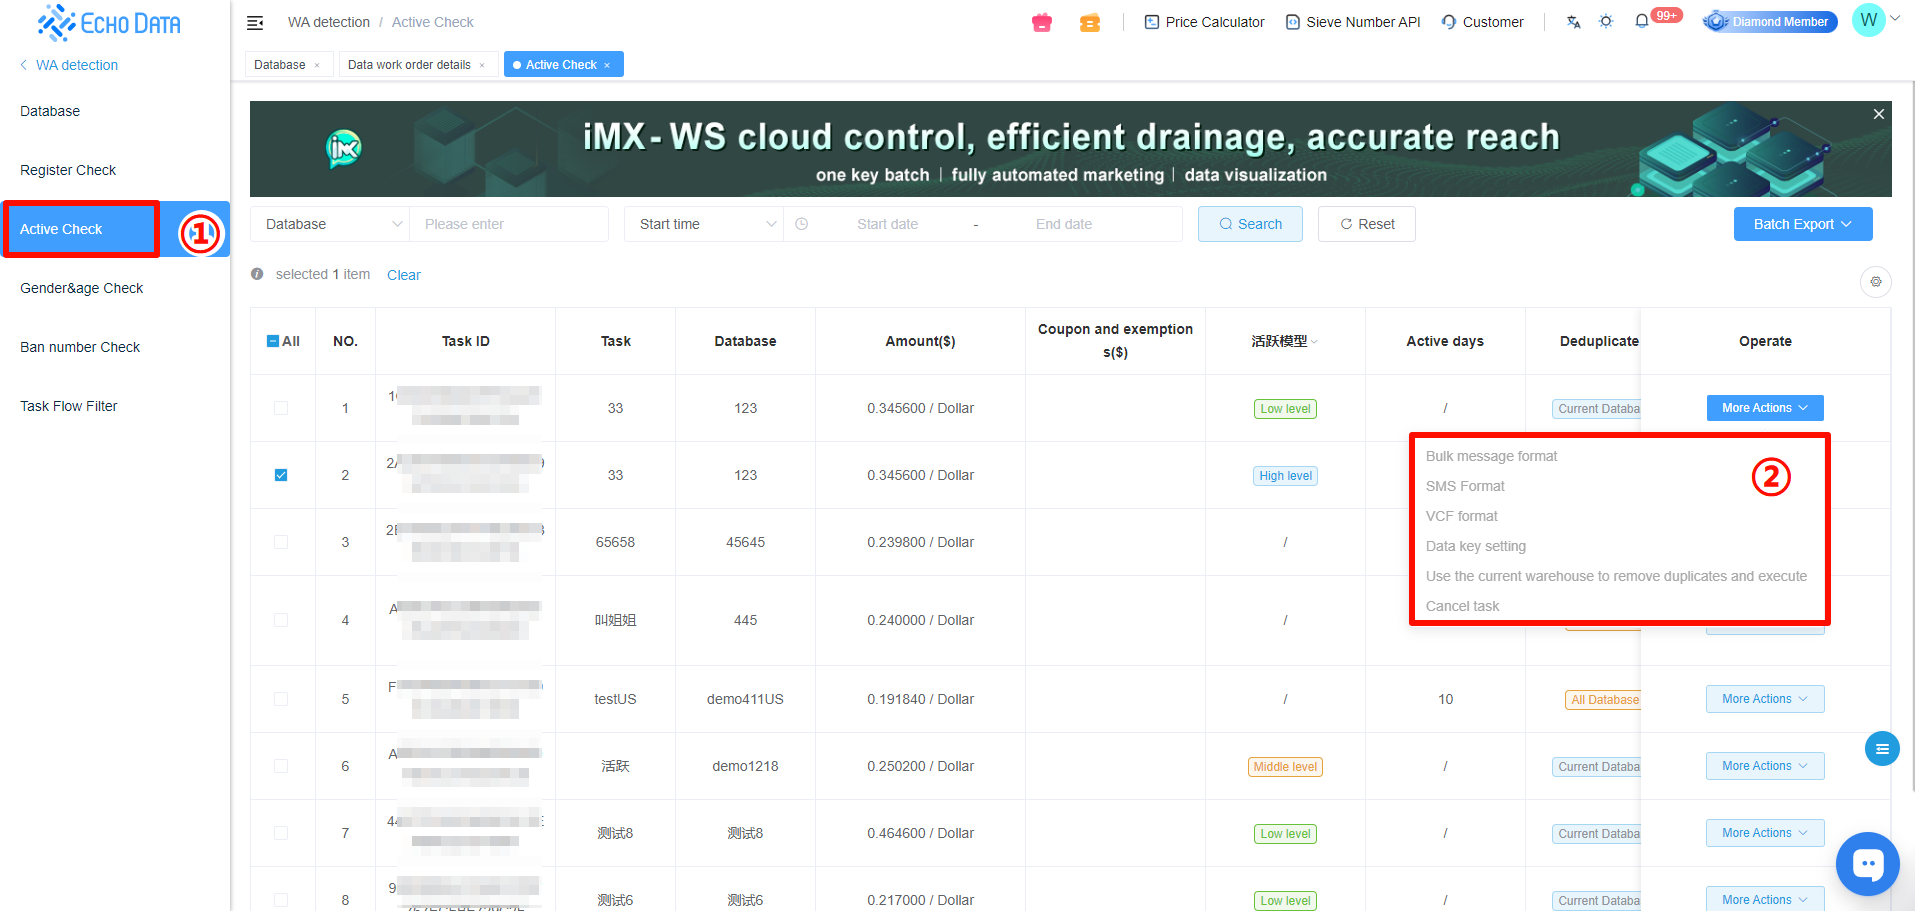
After submission, go to [Active Check] to check the filtering progress.
Here, you can view the task configurations and data details.
Click [More Actions] to export the data in the appropriate format based on your usage needs.
5、Gender Filter
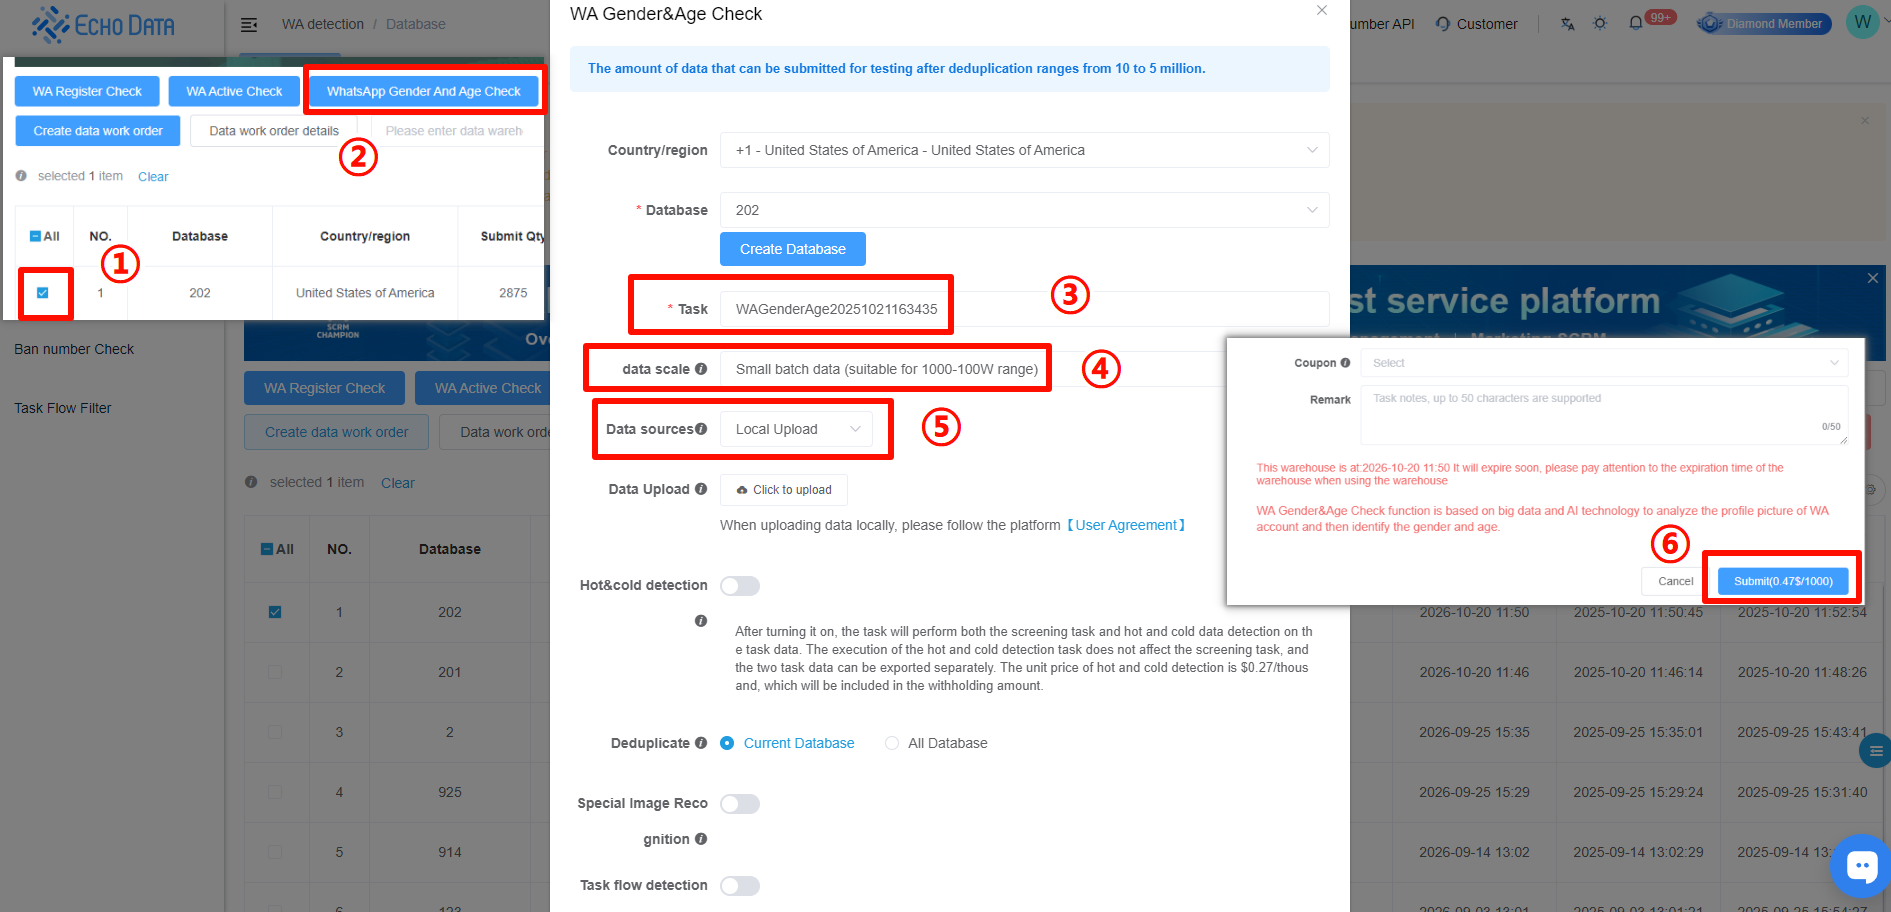
1.Select the corresponding data repository, then click [WhatsApp Gender & Age Check].
2.Enter the task name.
3.Choose the data size.
4.Select the Data Sources:
Option 1: Upload local data for filtering.
Option 2: Use data from the system for filtering.
5.Choose whether to filter all repository data or data from a specific task.
6.Select the dataset you wish to apply the Gender Filter to.
7.Enable optional features as needed: Hot/Cold Detection, Image Recognition, or Task Flow Filtering.
8.Upload the data and click [Submit] to start the filtering process.
Note: A minimum of 1,000 records (after deduplication) is required to begin filtering.
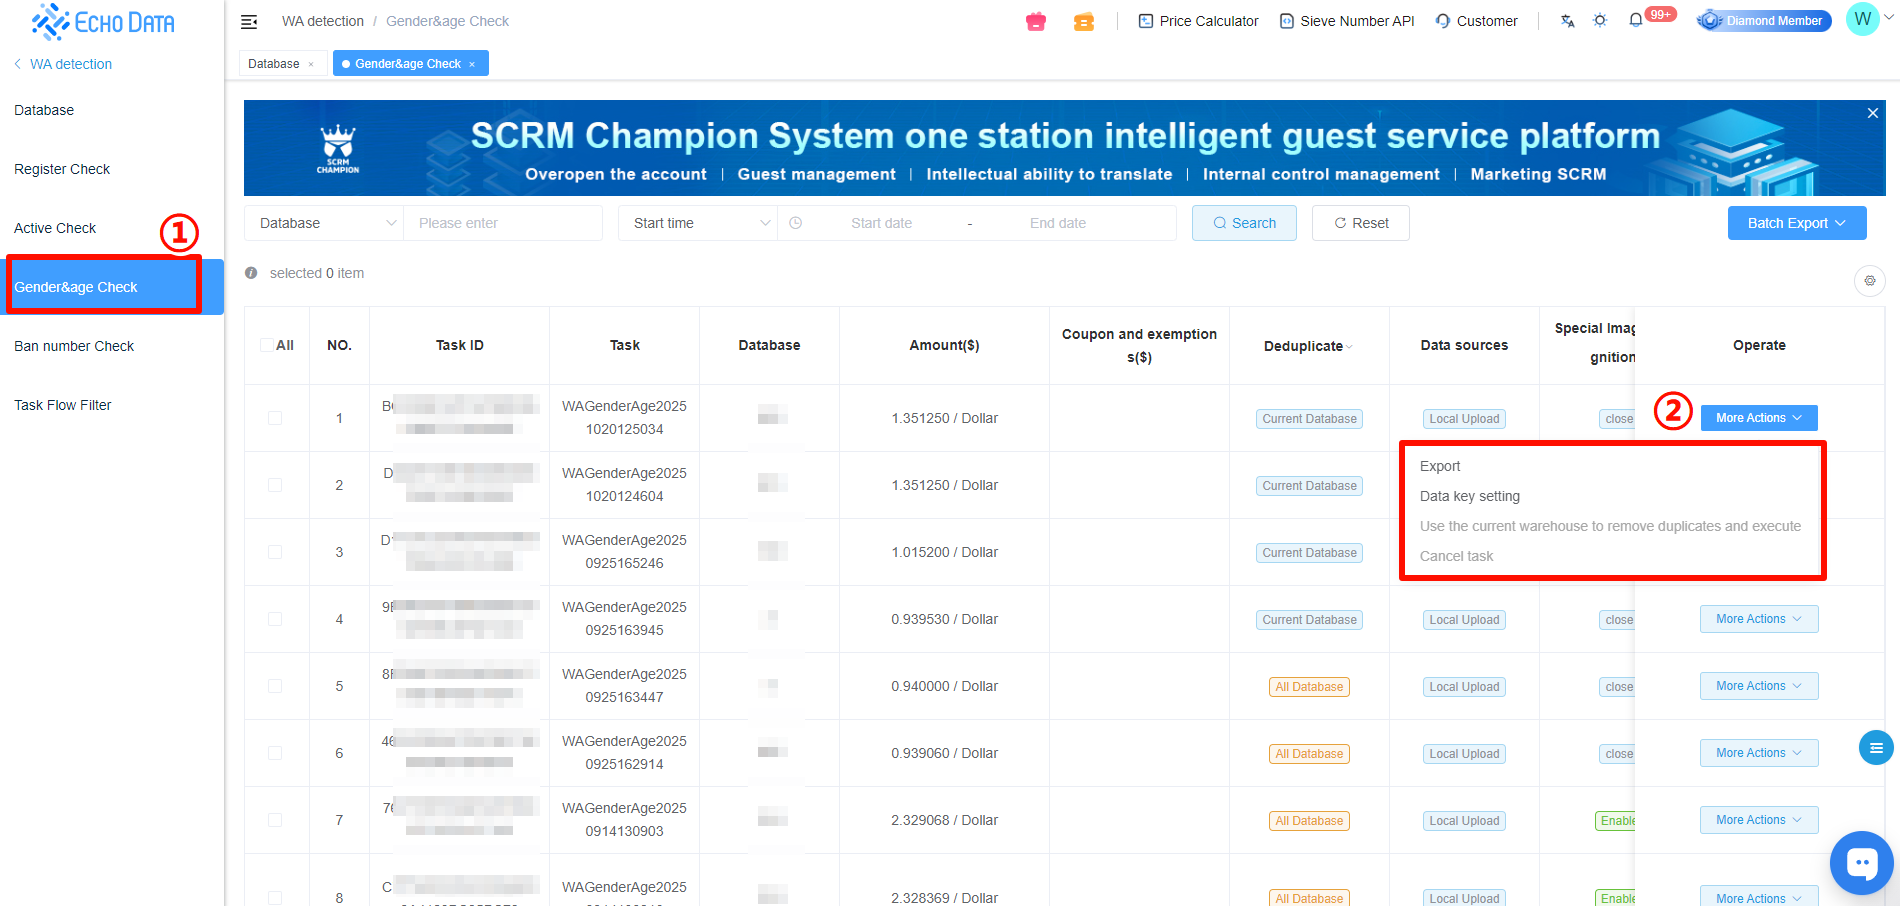
After submission, go to [Gender & Age Check] to check the filtering progress.
Here, you can review detailed task configurations and data status.
Click [More Actions] to export the data in the format best suited for your use case.
6、Banned Account Filter
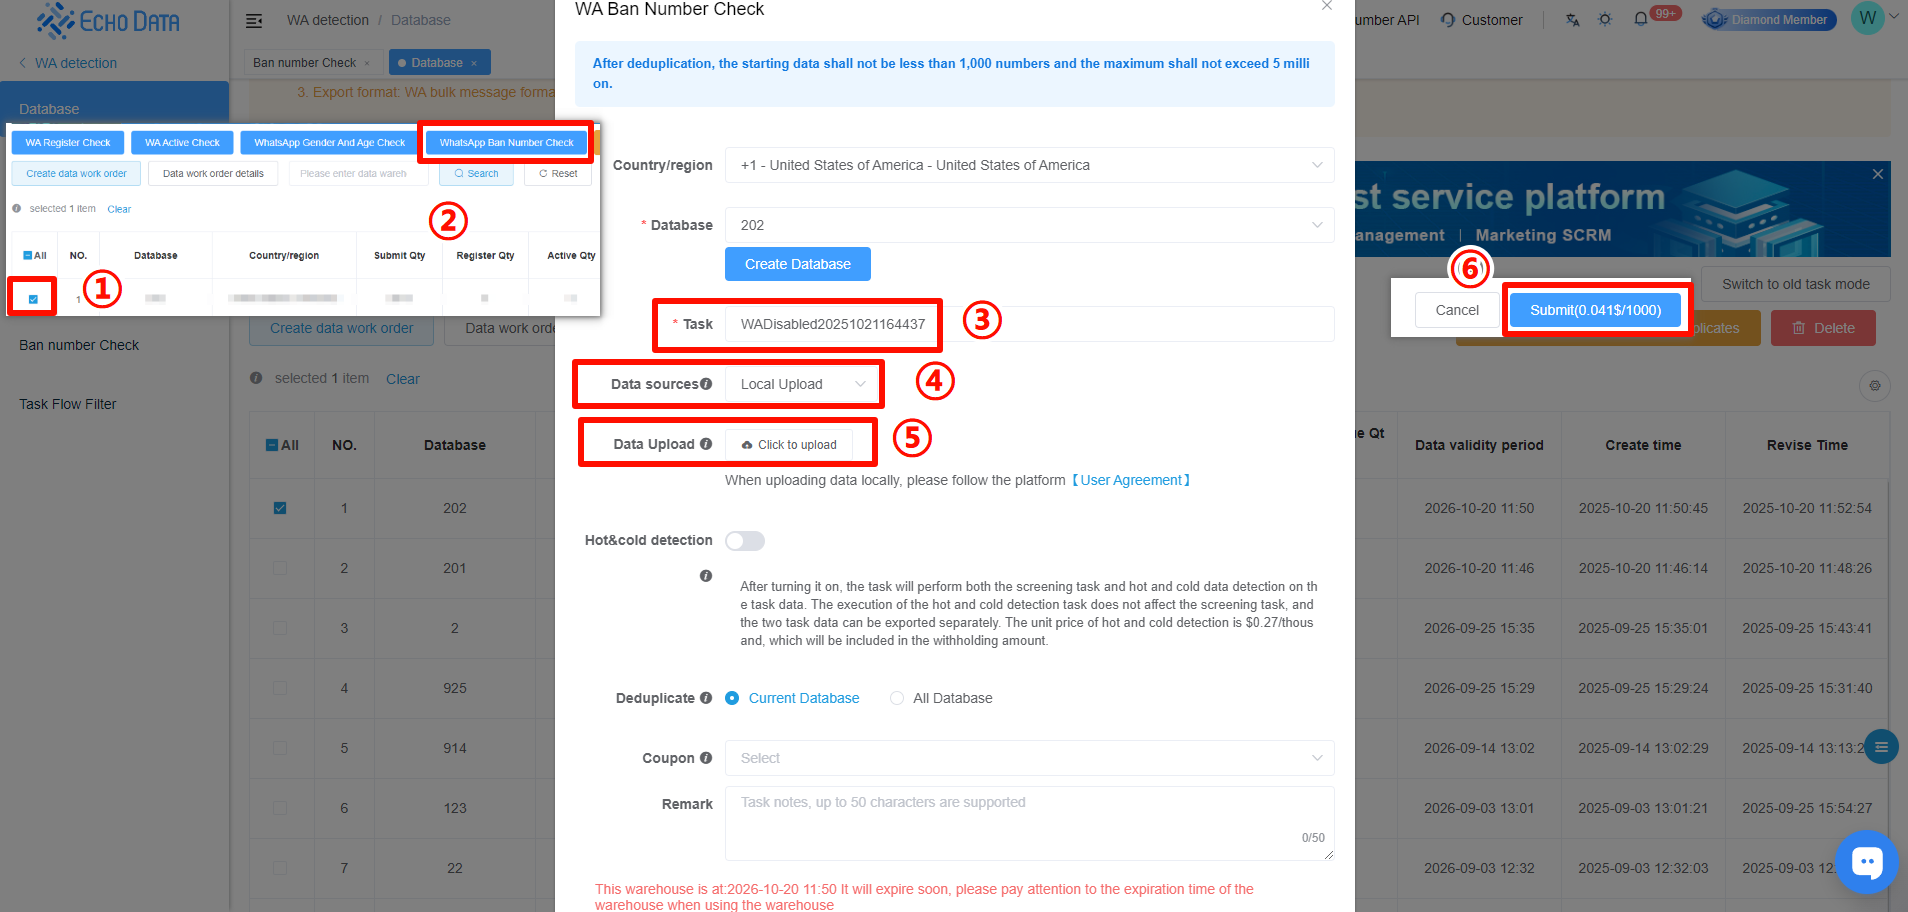
1.Select the corresponding data repository and click [WhatsApp Ban Number Check].
2.Enter the task name.
3.Choose the Data Sources:
Option 1: Upload local data for filtering.
Option 2: Select data already available in the system.
4.Select either all data in the repository or data from a specific task.
5.Choose the dataset you want to filter for banned accounts.
6.Enable Hot/Cold Detection if needed.
7.Click [Submit] to start filtering.
Note: The minimum data size for filtering is 1,000 records (after deduplication).
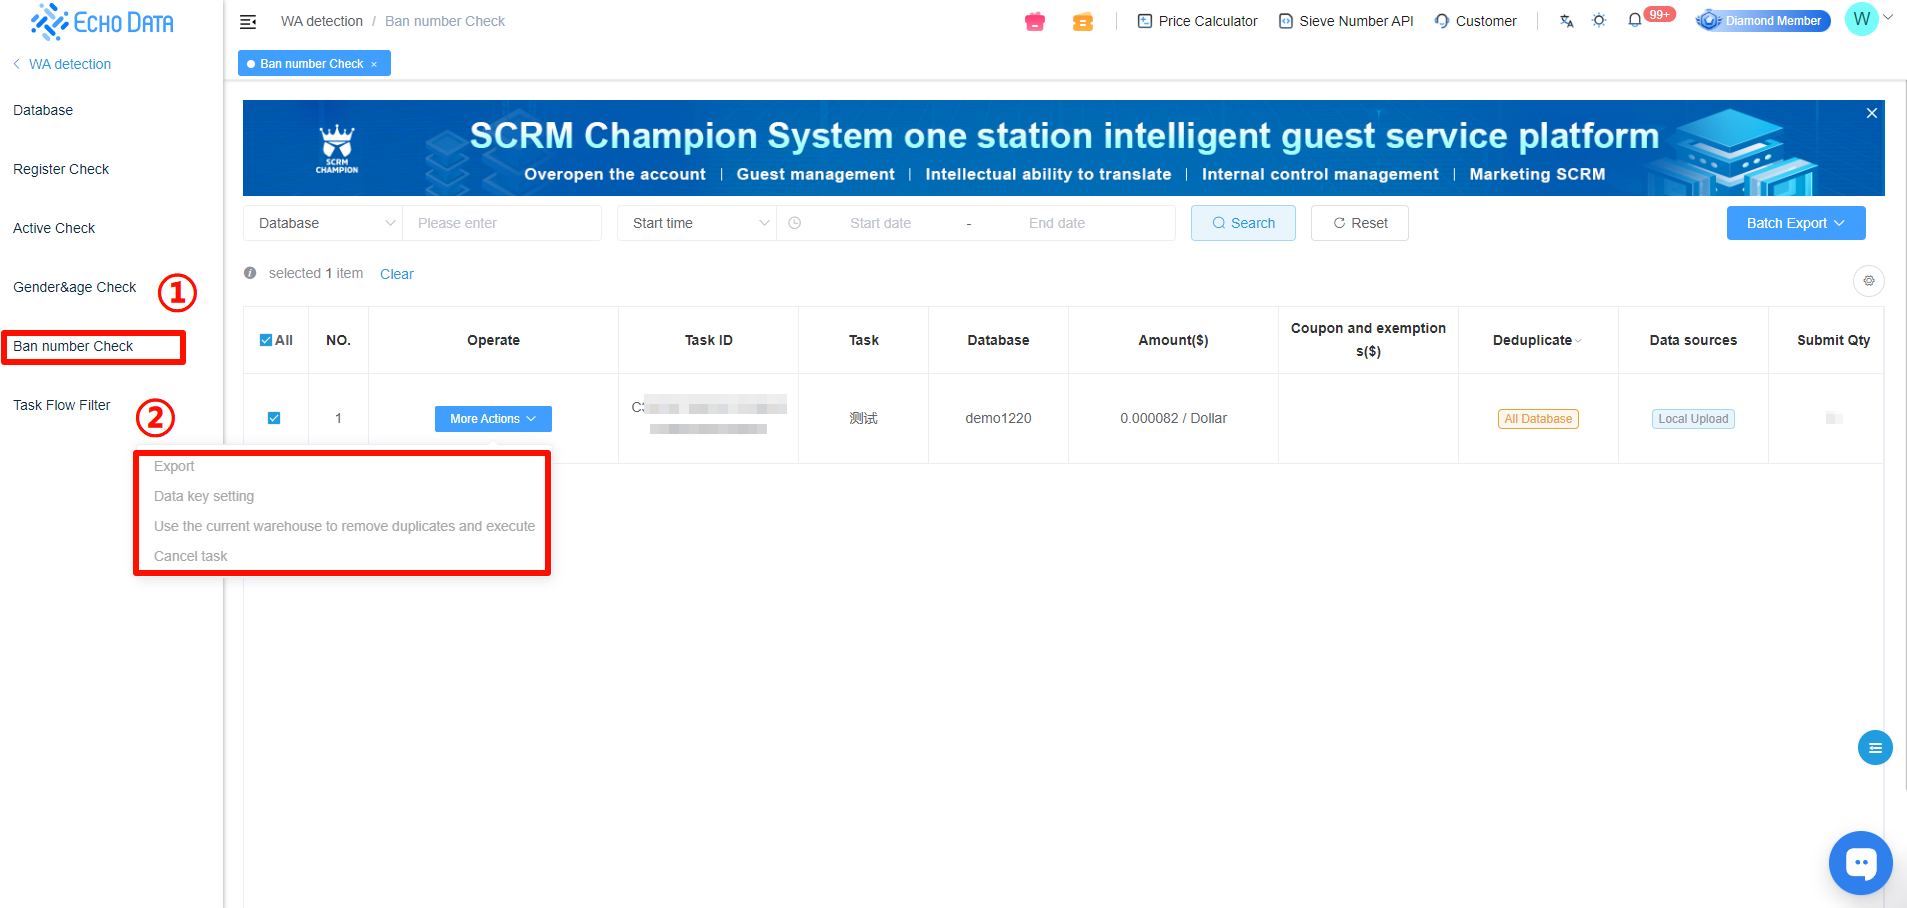
After submission, go to [Ban Number Check] to view the filtering progress.
Here, you can check the task configuration details and data status.
Click [More Actions] to export the data format based on your usage needs.
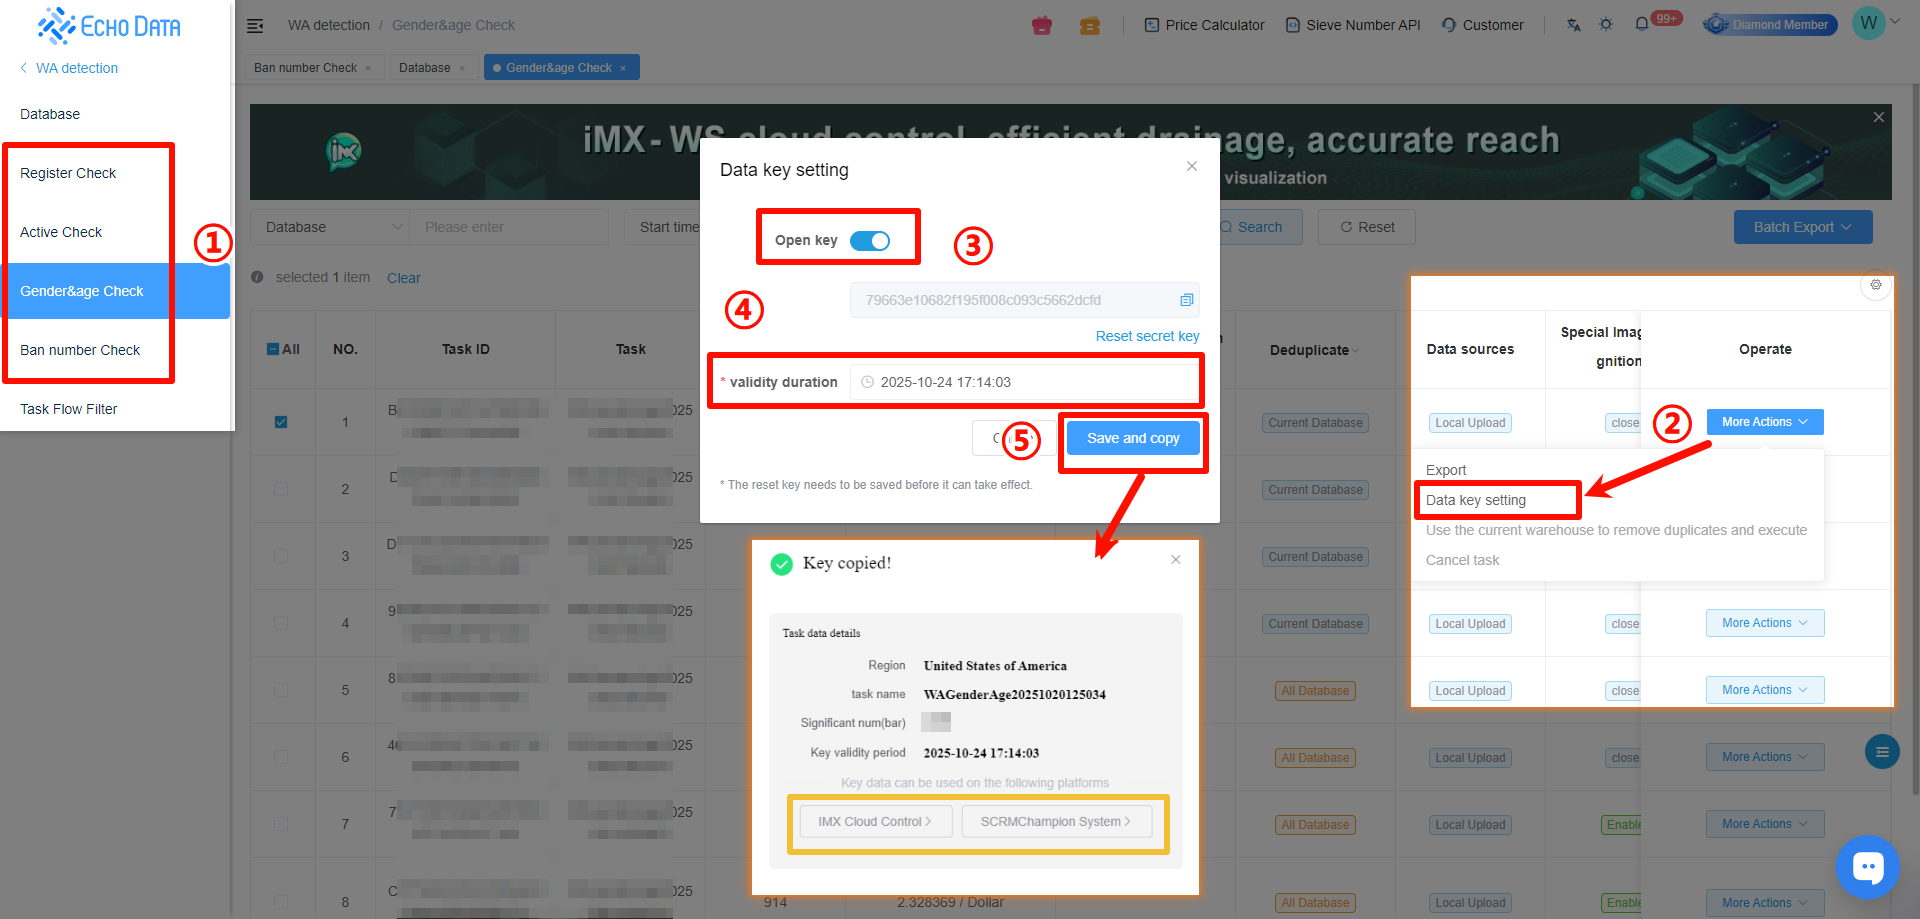
7、How to Acquire Leads After Filtering
After filtering, the data can be used for lead generation through various methods such as contact engagement, friend-adding, bulk messaging, or group marketing (creating or managing active groups).
If you are using iMX Cloud Control or SCRM Champion System, you can quickly connect the filtered data using an [Access Key] instead of exporting and re-uploading files.
1.Click [Data Key Setting]
2.Enable Open Key and set the validity period to save it.
3.Click [iMX Cloud Control] or [SCRM Champion System] to access the corresponding backend system directly.
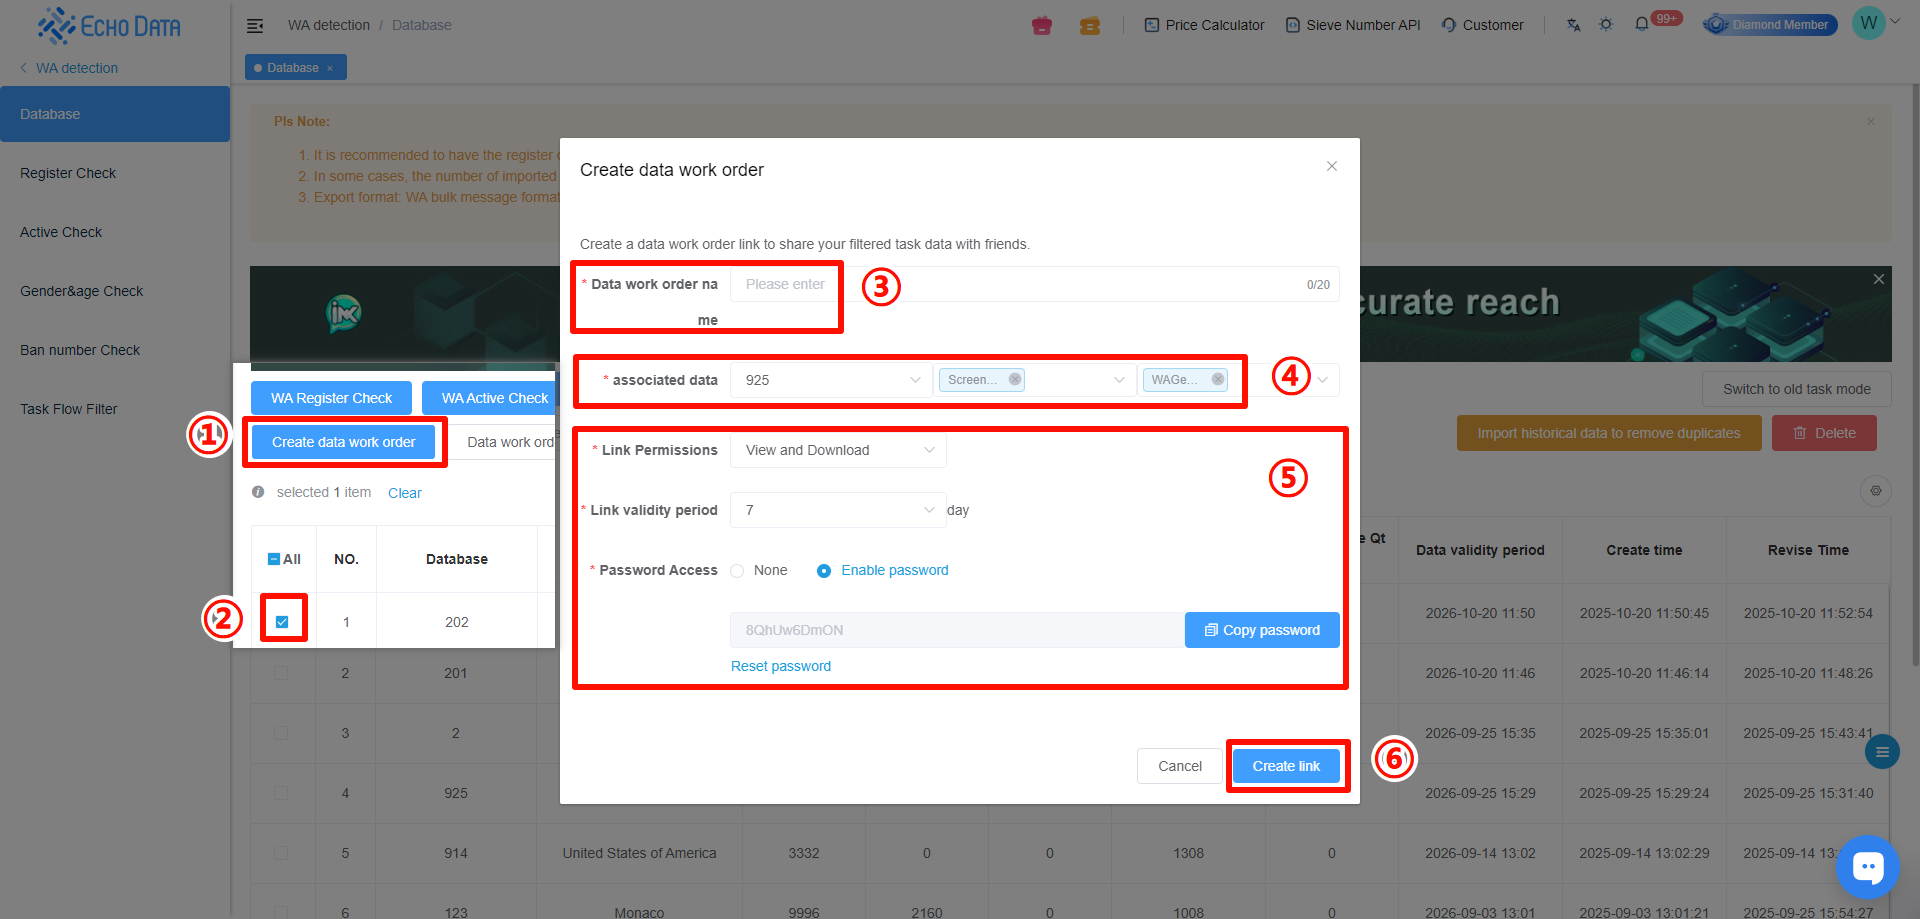
8.Sharing Data with Team Members or Friends
If you want to share filtered data with your team, employees, or friends for viewing and download, you can use a [Database].
This method is faster and more secure than sending TXT files or ZIP archives.
1.Click [Create Data Wok Order]
2.Enter the Data Work Order Name and select the Associated Data.
3.Set Link Permissions, Link Validity Period, and Password Access, then confirm creation.
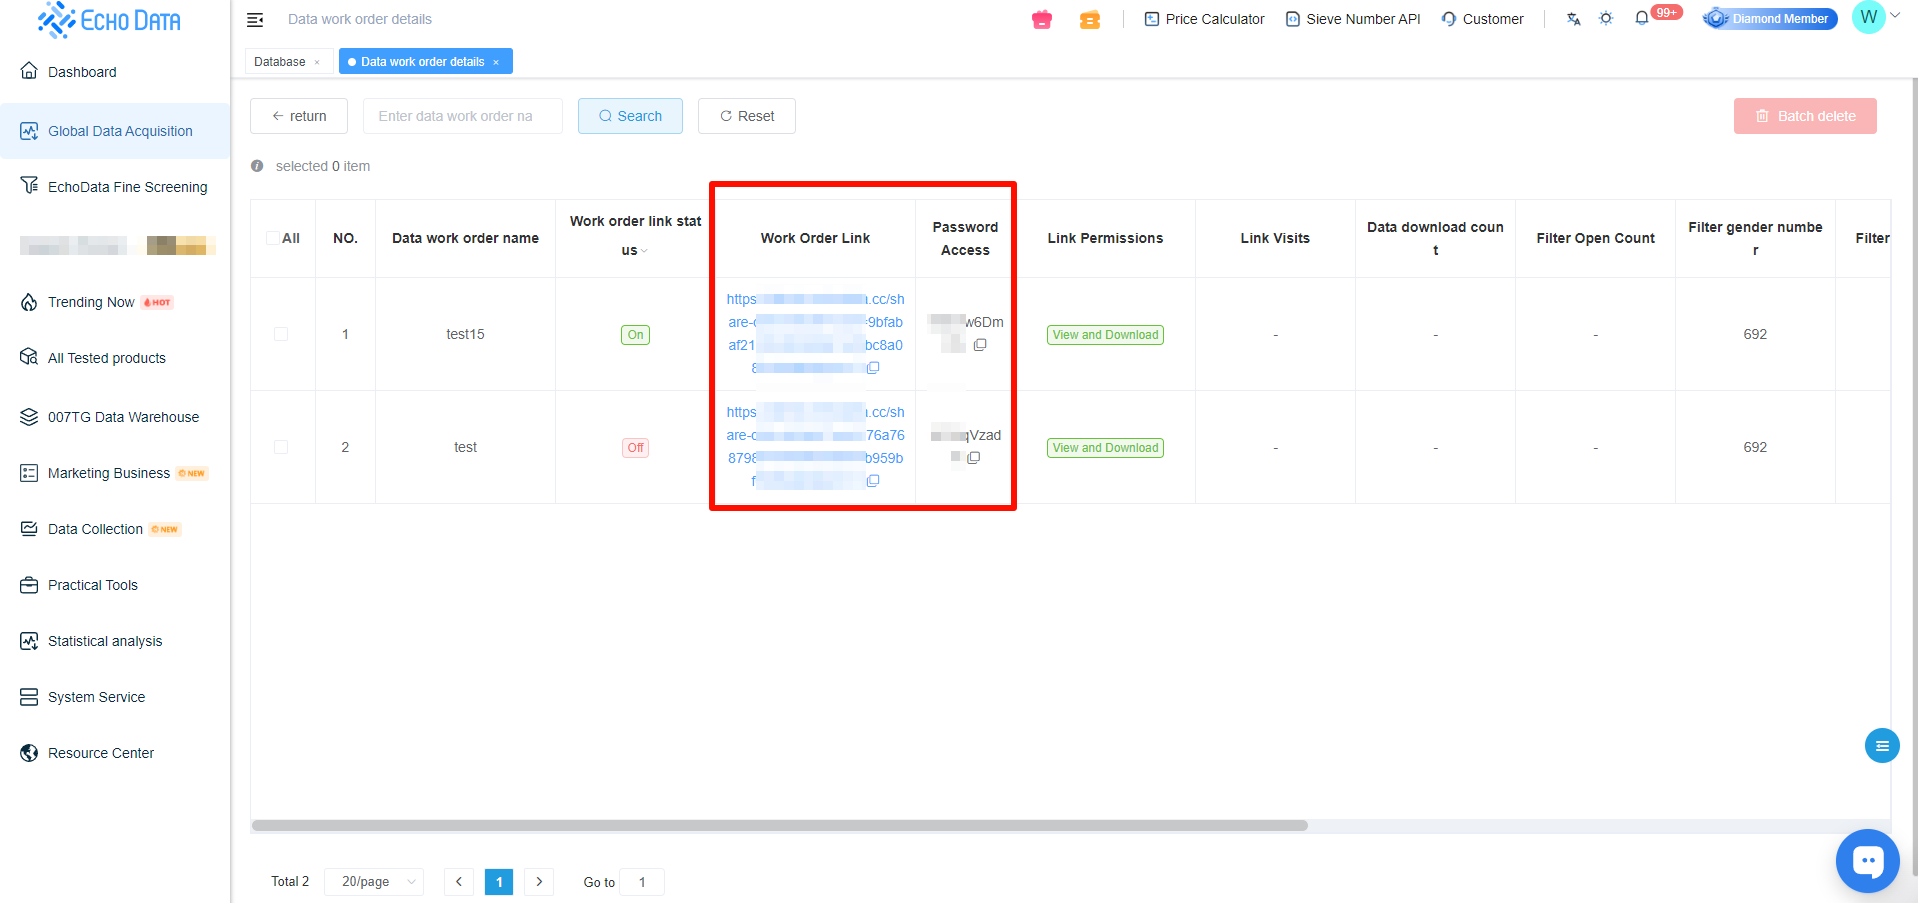
4.Once created, share the link and password with others. They can view and download the data directly through the shared link.